After you’ve successfully installed the plugin and took your first steps, it’s time to start your time tracking.
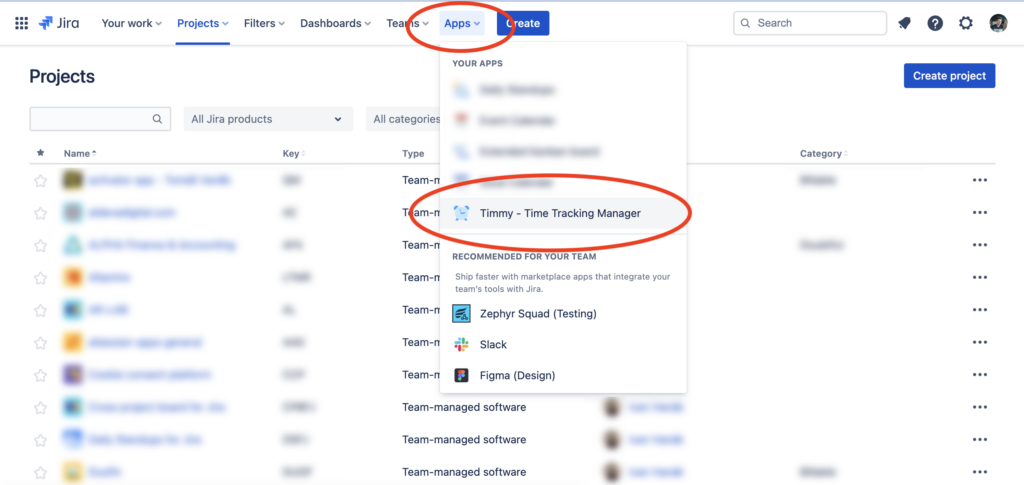
1. Open up Timmy
From the top navigation panel select “Apps” -> “Timmy – Time Tracking Manager“
2. Open the time tracking window
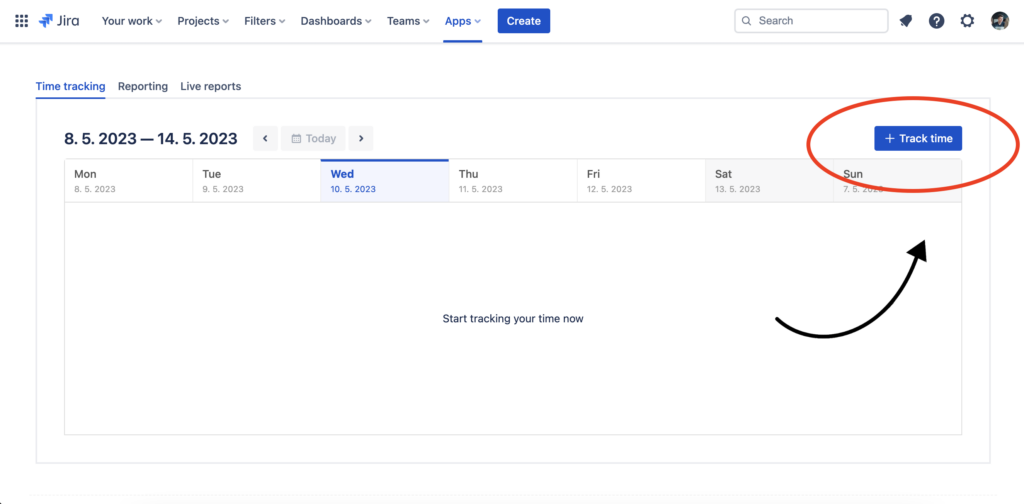
Once the interface of the plugin appears, you can start tracking your time. To proceed click “Track time” button on the top right part of your screen.
3. Enter time tracking data
In the time tracking window enter the required task data:
- select a project for time tracking
- pick an issue from the list of available issues (or find your issue by the summary)
- enter a note for the time tracking record (this step optional)
- enter tracked time (e.g 35m, 2h, 1d…)
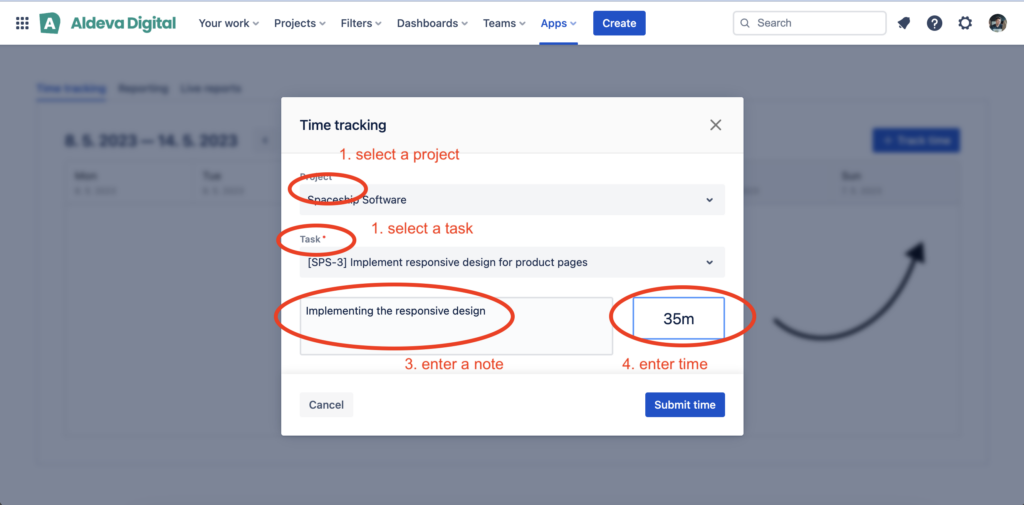
After you’ve entered all of the required information, you’re good to go and save the time by clicking “Submit time” button.
4. That’s it
After you’ve entered the time, it will appear in the list of time records.
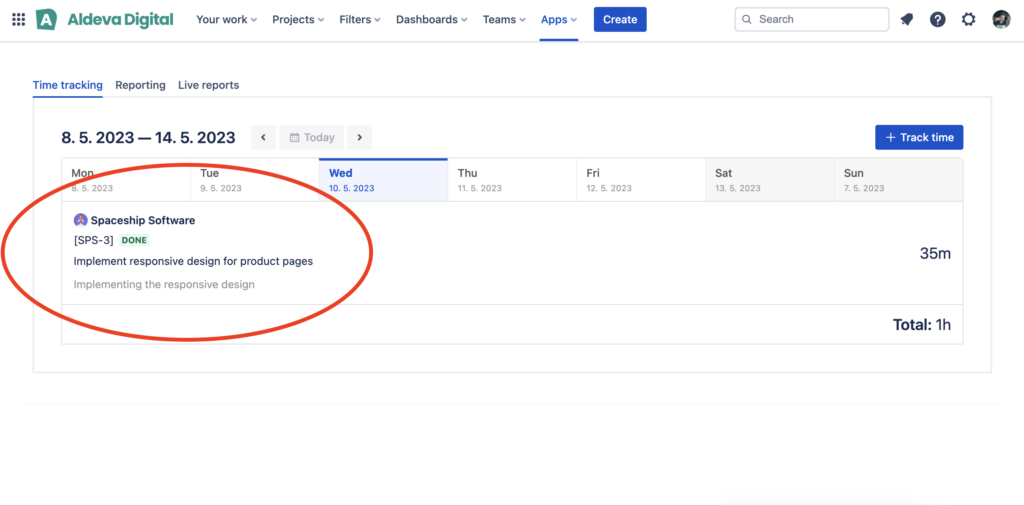
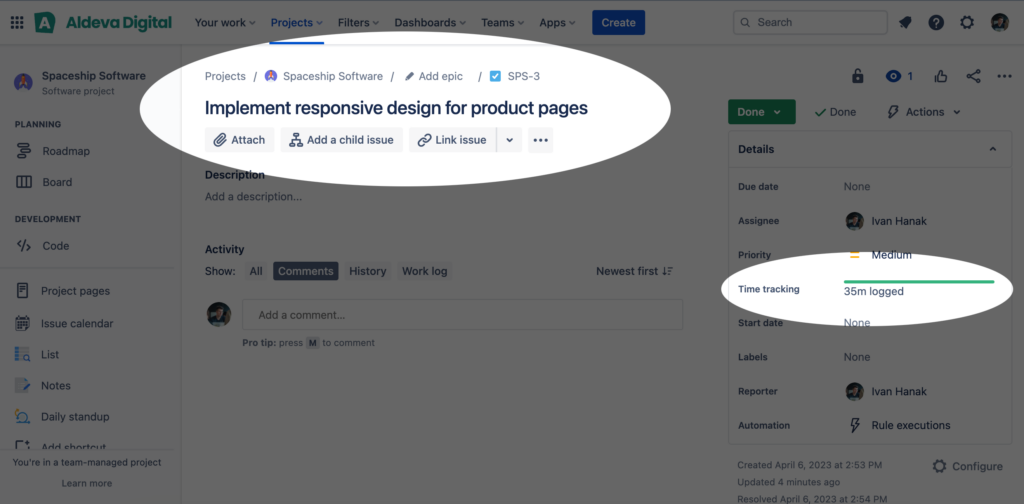
Also, the time you’ve tracked is visible on the issue screen – as shown on the screenshot below:
5. What’s next?
After you’ve managed to record your time, it’s time to 👉 take a look at reported time!
